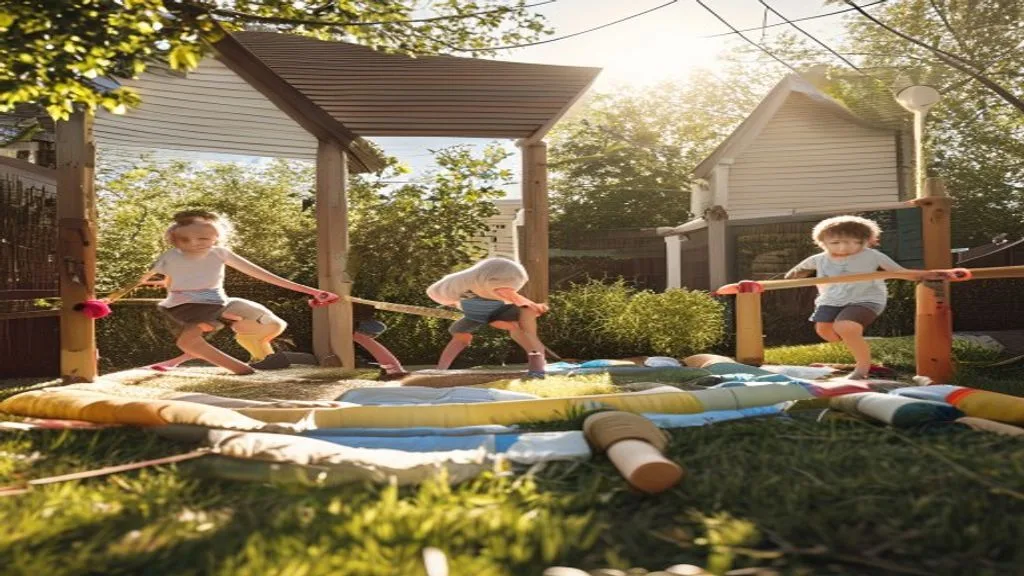
How to make a backyard obstacle course for kids with no equipment is easier than you think—you likely already own everything you need. By combining household items and nature's free resources, you can build an engaging, skill-boosting course that keeps children active and entertained for hours, no dollar-store purchases required. This guide shows you exactly which stations to create, what gross motor skills each one develops, and how to adapt them for toddlers, preschoolers, and older kids.
Key Takeaways
- Build obstacle stations using only household items (blankets, rope, hula hoops, pool noodles, cushions, chairs) and yard materials (sticks, stones, logs).
- Each station targets a specific motor skill: balance beams develop proprioception, tunnels strengthen crawling and spatial awareness, and weaving courses build coordination.
- Adapt difficulty and complexity by age—toddlers (18 months–3 years) do single-step tasks, preschoolers (3–5 years) link two to three stations, and school-age kids (5+ years) complete multi-step relay courses.
- Create a scavenger element by hiding challenges within your existing yard landscape, turning trees, hills, and garden spaces into natural obstacle components.
- Rotate and rearrange stations weekly using the same materials to maintain novelty and prevent boredom.
Why Build a No-Equipment Obstacle Course?
Obstacle courses are one of the most effective ways to develop gross motor skills, balance, and spatial awareness in children. According to the American Academy of Pediatrics, active outdoor play supports physical fitness, coordination, and mental health. When you build a course using only what you have, you eliminate cost barriers and teach kids resourcefulness.
A no-equipment obstacle course teaches children that fun doesn't require spending money—a valuable life lesson. Plus, you control every element for safety, adjust difficulty in real time, and create memories together by building it as a family project.
Station 1: Balance Beam (Proprioception & Focus)
A balance beam trains proprioception—the body's awareness of its position in space—and strengthens ankles and core stability. Create one by laying a garden hose, rope, or even a line of stones in a straight path on the ground.
- Garden hose method: Lay a 6–10 foot hose in a straight line. Ask kids to walk heel-to-toe along it without stepping off.
- Rope line: Secure a rope between two points (or let it lie flat) and have children walk it forward, backward, or sideways.
- Stone path: Arrange stepping stones, bricks, or flat wood pieces in a line 6 inches apart. Kids balance with each step.
- Raised log beam: If you have a fallen branch or log, place it on two low supports (stacked cinder blocks, small boxes). Kids walk across—this is harder than ground level.
For toddlers, make the line wavy instead of straight. For older kids, add arms-raised or eyes-closed variations. Physical activity experts recommend 60 minutes daily for children aged 3–17, and obstacle courses help you meet that goal in an enjoyable way.
Station 2: Tunnel Crawling (Spatial Awareness & Upper-Body Strength)
Crawling through tunnels builds upper-body and core strength while developing spatial awareness and proprioception. Tunnel crawling teaches kids to navigate their body through confined spaces—a critical motor skill.
DIY Tunnel Options
- Blanket tunnel: Drape blankets or sheets over a clothesline, rope, or chairs to create a low tent. Kids crawl underneath.
- Cushion tunnel: Stack sofa cushions into an arch, or lean them against each other to form a passage. Lightweight enough for kids to adjust if needed.
- Cardboard box tunnel: Cut open the ends of large boxes (appliance boxes are ideal) and tape them together in a line. Kids crawl through.
- Pool noodle arch: Bend pool noodles into hoops and tape them to create a tunnel frame. Drape a sheet over the top.
- Natural tunnel: Use low-hanging branches or dense shrubs in your yard as a natural crawl-through space.
Make tunnels 3–4 feet long so kids don't feel trapped. For toddlers, use wide-open tunnels. For older kids, make them narrower or add a visual tracking challenge—place colored objects outside the tunnel that kids must spot while crawling.
Station 3: Jumping & Leaping (Power & Coordination)
Jumping challenges build leg power, balance, and coordination. They're also high-energy fun.
- Cushion hopscotch: Arrange sofa cushions in a line or hopscotch pattern on the ground. Kids hop from cushion to cushion without touching the grass (the "hot lava floor game").
- Hula hoop jump: Scatter hula hoops on the ground and have kids jump from one to the next. For a harder version, kids must jump on two feet; for toddlers, they step into each hoop.
- Towel squares: Lay out bath towels or sheets in a line or grid. Kids jump between them, landing on both feet or one foot.
- Rope circles: Arrange ropes into circles on the ground and have kids jump in and out of each one.
Space obstacles 2–3 feet apart for ages 3–5, and 3–4 feet for school-age children. Challenge older kids by timing them or asking them to jump backward.
Station 4: Weaving & Slalom Courses (Agility & Visual Tracking)
Weaving courses develop agility, coordination, and visual tracking. Kids learn to navigate around obstacles while maintaining speed and control—skills that transfer to sports and daily life.
DIY Slalom Setup
Create "poles" or markers to weave around using household items:
- Tall water bottles or laundry baskets filled with sand (weighted and stable)
- Sticks or garden stakes pushed into the ground
- Chalk circles drawn on pavement (kids weave around, not through them)
- Pool noodles placed vertically in buckets or horizontally on the ground
- Flower pots or plant containers arranged in a line
Space markers 3–4 feet apart and have kids run a weaving pattern through them—forward, backward, or on a relay team. For younger children, use wider spacing. Older kids can increase speed or add a ball to carry while weaving. Research shows that agility challenges improve hand-eye coordination and reaction time in children.
Station 5: Climbing & Upper-Body Challenges (Strength & Confidence)
Climbing and pulling movements build upper-body strength, confidence, and problem-solving. Safe climbing stations teach kids to assess risk and manage their own safety.
- Low ladder climb: A sturdy step ladder (4–5 feet) positioned so kids climb up one side and down the other, or sideways through the rungs.
- Log balance with climb: A fallen log leaning against a tree or structure creates a natural ramp to climb.
- Rope climb: Hang a rope from a low branch (testing it first for safety) so kids can pull themselves up, hand over hand, and slide down.
- Monkey bars substitute: A thick rope strung horizontally between two trees or posts lets kids swing and traverse across.
- Chair challenge: Sturdy chairs placed in a line allow kids to climb over (not on) them safely.
Always supervise climbing stations closely. For toddlers, offer stable, low structures only. Older kids can handle higher, more challenging options.
Station 6: Bear Crawls & Crawling Variations (Core Strength & Proprioception)
Crawling in different ways—bear crawl, crab walk, snake slither—strengthens the core and develops body awareness. Unlike tunnels, these are open movements across distance.
- Bear crawl path: Mark a 10–15 foot line with chalk or rope. Kids move on hands and feet with hips high (like a bear) along the path.
- Crab walk zone: Another marked path where kids move on hands and feet with bellies facing up, legs leading.
- Snake crawl: Kids lie on their bellies and "slither" forward using only arms and legs, no rolling.
- Seal walk: Kids move forward on hands only, dragging their legs behind them.
These require no equipment—just a clear space. Set a timer and see how fast kids can cross, or add a secondary challenge like "don't let your knees touch the ground" (bear crawl) or "move sideways" (crab walk).
Putting It All Together: Sample Obstacle Course Layouts
| Age Group | Stations | Duration | Difficulty |
|---|---|---|---|
| Toddlers (18–36 months) | Balance line, wide blanket tunnel, cushion hopscotch, bear crawl (supervised) | 15–20 minutes | Low (single tasks, flat surfaces, adult support) |
| Preschool (3–5 years) | Balance beam, tunnel crawl, hula hoop jump, weaving (4–5 markers), low climbing | 20–30 minutes | Medium (multi-step course, varied surfaces) |
| School-age (5–8 years) | Raised balance beam, narrow tunnel, rope jump, slalom weave, low rope climb, bear crawl | 30–45 minutes | High (multi-step relay, speed challenges, combinations) |
| Older kids (8+ years) | All stations, timed relay races, backward movements, added restrictions (eyes closed, hopping) | 45–60 minutes | Very high (races, complex sequences, endurance) |
Safety Tips & Best Practices
Before kids start, walk the entire course yourself and test every structure. Clear the area of sharp objects, tripping hazards, and obstacles outside the course. Establish a "safe" zone where kids wait between turns and set clear rules (no running during set-up, one person at a time on climbing stations).
Supervise constantly, especially with children under 5. Always use age-appropriate equipment and heights, and teach kids to respect their own limits. Rotate stations weekly or rearrange them to prevent boredom and keep the challenge fresh.
Extending Play: Relay Races & Themed Courses
Once the basic course is set, add complexity. Organize relay races where kids compete in teams, with each child completing one station before tagging the next person. Time individual runs and challenge kids to beat their personal record.
Create themed courses—a "jungle adventure" (tunnel, climbing, weaving), a "spy mission" (low crawls under "laser" ropes, silent balance walks, rapid weaving), or a "superhero training ground" (strength challenges, speed tests, high-obstacle courses). Themes engage imagination and keep kids motivated.
Frequently Asked Questions
What household items can I use to build a free backyard obstacle course for kids?
Pool noodles, hula hoops, blankets, sheets, cushions, rope, garden hoses, chairs, step ladders, cardboard boxes, towels, water bottles, and garden stakes are all excellent choices. You can also use yard materials like sticks, logs, stones, and low branches. The key is repurposing items safely—test each structure before kids use it.
How do I build a tunnel for kids to crawl through without buying equipment?
Drape blankets or sheets over a clothesline, rope stretched between chairs, or low branches to create a tent-like tunnel. Alternatively, stack cushions into an arch, lean them against each other, or tape cardboard boxes together. For a wider tunnel, use pool noodles bent into hoops and covered with a sheet. Make sure the tunnel is at least 3–4 feet long and stable enough that kids won't accidentally collapse it.
What are the best gross motor activities for an outdoor obstacle course?
Balance walking (proprioception), crawling and tunneling (spatial awareness and core strength), jumping (power and coordination), weaving (agility), climbing (upper-body strength), and bear crawls (core engagement) all develop critical gross motor skills. Each activity targets different muscle groups and movement patterns, so a well-rounded course includes several types.
How can I make a slalom or weaving game for kids without buying poles?
Use weighted water bottles, garden stakes, flower pots, sticks pushed into the ground, or chalk circles drawn on pavement as markers. Space them 3–4 feet apart and have kids run a weaving pattern around them. You can also use low-lying items like towels or hula hoops arranged in a line for kids to weave between without knocking them over.
How do I adapt an obstacle course for different ages?
Toddlers (18–36 months) do single, flat-surface activities with adult support; preschoolers (3–5 years) link two to three stations with mild height or distance challenges; school-age kids (5–8 years) complete multi-step courses and timed challenges; and older kids (8+ years) enjoy relay races, backward movements, and speed variations. Always prioritize safety and let each child progress at their own pace.
Building a backyard obstacle course for kids with no equipment is one of the most rewarding investments of your time and energy. In just an afternoon, you'll have created a space where your kids develop real physical skills, build confidence, and burn off energy—all without spending a dime. Set up the course, let them loose, and watch what they discover about their own strength and courage.
Comments 0
Please Sign in to leave a comment.
No comments yet. Be the first to share your thoughts!